How to create a photo book using yourphotoscanned and Google Photo books
Do you have old photos, slides or negatives that you want to preserve and share with your loved ones?
If so, you might be interested in our service at yourphotoscanned. We can convert, copy, digitise, scan, transfer, or even upload to cloud storage your photos, pictures, slides, or negatives, into digital files that you can access from any device. You can also use them to create beautiful photo books with Google Photos.
Here's how.
Google Photos is a free app that lets you store, organize and edit your photos online. You can also use it to create personalized photo books that you can order and print. To do this, you need to have your photos scanned and uploaded to Google Photos. That's where we come in.
At yourphotoscanned, we offer a fast and reliable service to scan your photos, slides or negatives at high quality. We can also upload them to your Google Photos account for you, or send them to you on a USB drive or DVD. You can choose the resolution that suits your needs: 300 dpi for standard prints, or 600 dpi for larger prints.
List of Photo book suppliers
Please note these suppliers are mentioned here for information only, we have no affiliation to them.
Before you start
Assuming that yourphotoscanned have scanned your photos, please request that we share your scanned photos on google drive.
Note: we will share for one month to allow you to copy your photo scans to another location.
Note: we will share for one month to allow you to copy your photo scans to another location.
Step 1
- 1. In your browser log into your gmail account
- 2. Click on this link: Google Photo books
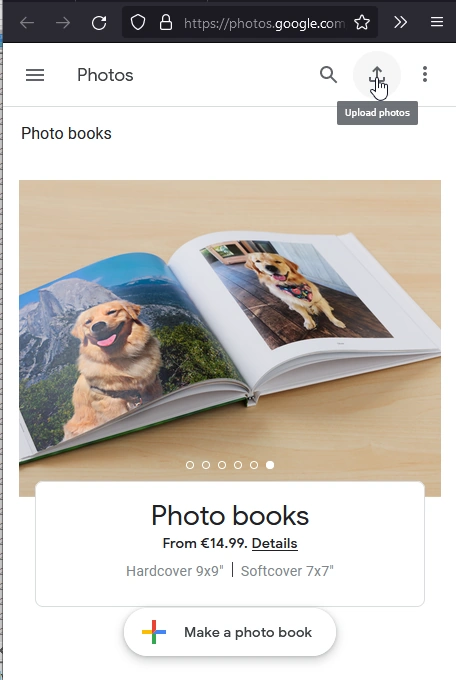
- 3. Click on the "Upload photos" icon as shown on the screen shot below
Step 2
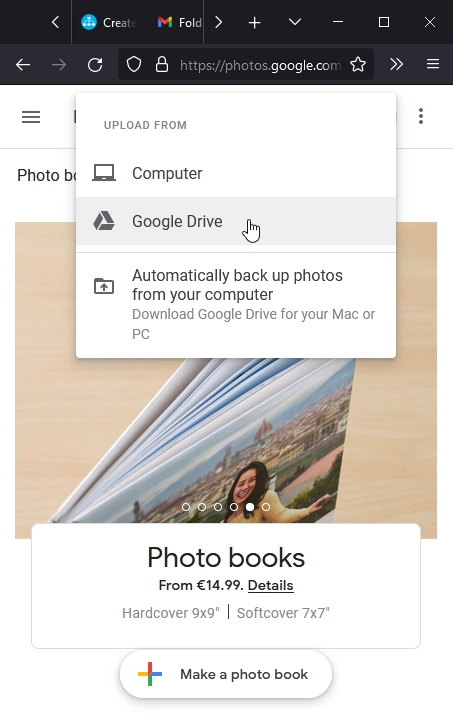
- 4. Click on "Google Drive"
Step 3
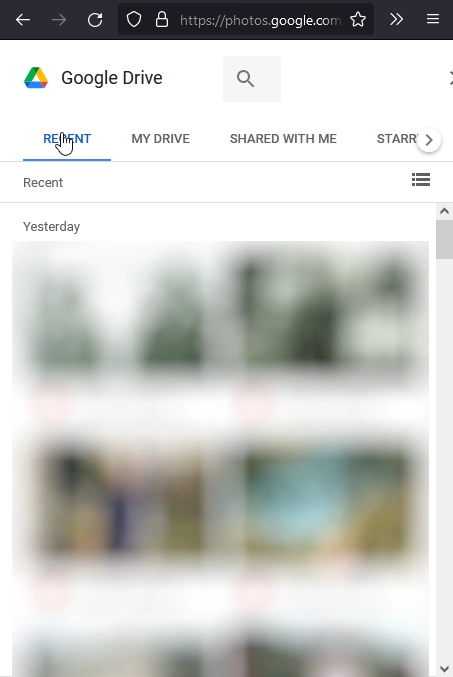
- 5. You will be shown your photo recent files
Step 4
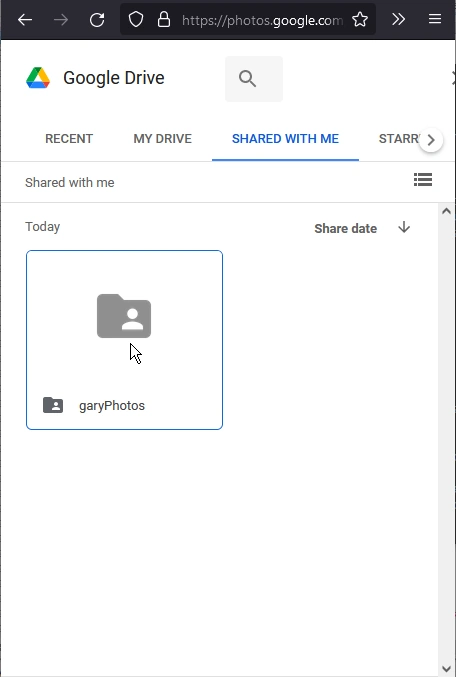
- 6. Click on "Shared with me"
- 7. You should now see the folder that was shared by yourphotoscanned in this case its called "garyPhotos"
- 8. Click\double click on "garyPhotos"
Step 5
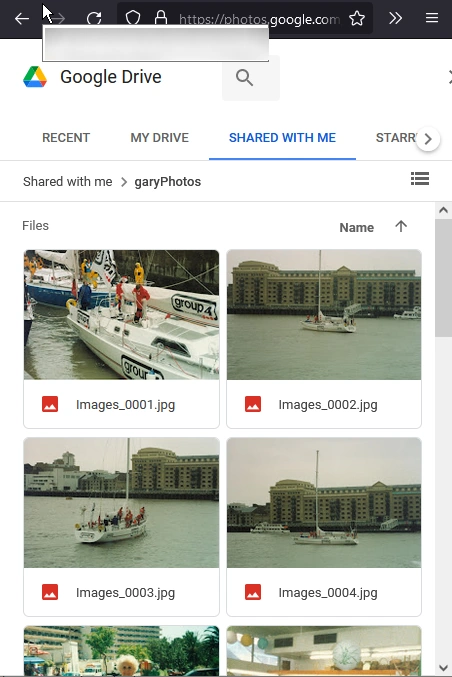
- 9. You should now see all the photos in the "garyPhotos" folder
Step 6
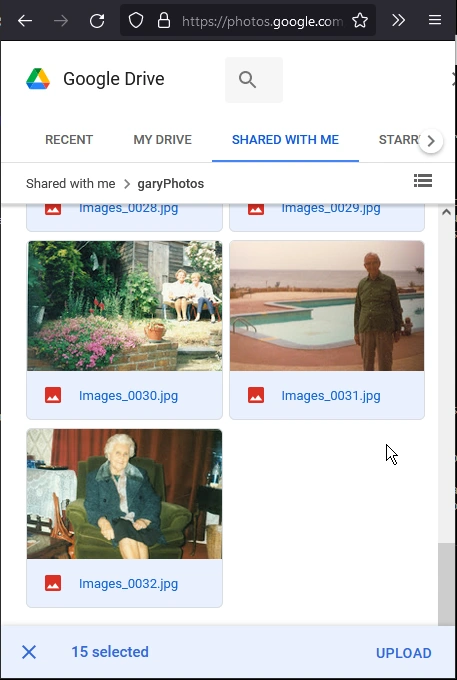
- 10. Select all the photos that you want to use
- 11. Click the "Upload" button
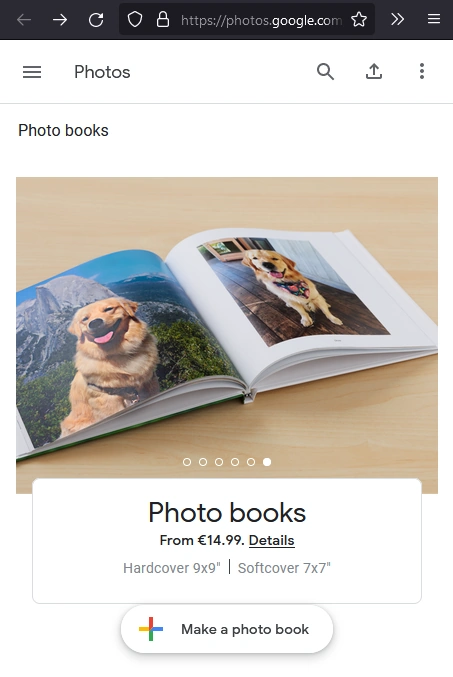
Step 7
- 12. Click on the "Make a photo book"
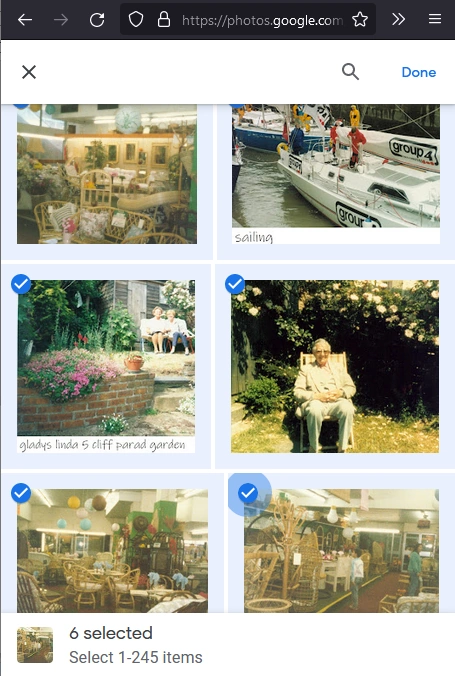
Step 8
- 13. Select the photos you want to use
- 14. Click "Done" at the top of the page
Step 9
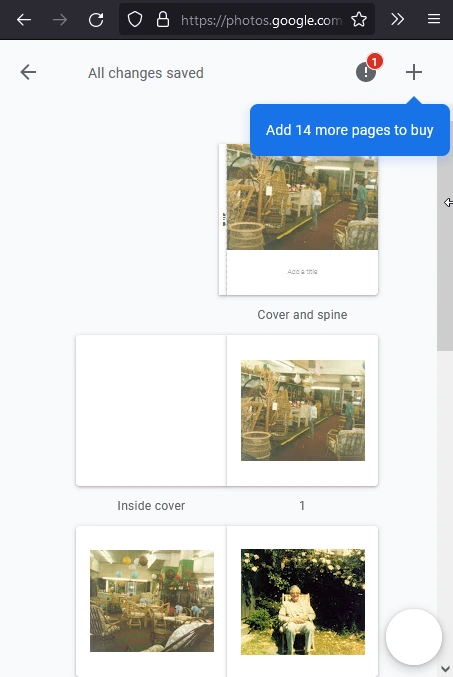
- 15. Finalise your photobook using the on screen directions
- 16. Remember have fun and take your time!